 .
.Spending accounts enable administrators (e.g., department managers) to set a spending limit for departments and/or users/buyers for a specified time period (month/quarter/year/one time) in accordance with budgetary allocations. The budget can thus be updated based on money spent in the specified time frame (e.g., month, quarter, year/one time). User/buyers are able to see the balance of their department or personal budgeted account on the MarketDirect StoreFront site (on the site banner when the user is logged in).
The spending data will be available for generating a report to track spending by user and department for a given time period. Administrators can also set an option that will reset the spending limit at the end of the specified time period. The system will check spending account limit before allowing the buyer to proceed to the Payment Method page. If the buyer's order exceeds the current spending account balance he or she will not be able to continue with the order.
When the spending account is depleted, users will not be able to place an order until the spending account is replenished. MarketDirect StoreFront does not offer spending account buyers with an alternative method of payment when a Spending Account limit is reached.
You can import spending accounts into MarketDirect
StoreFront. For more information, see Importing.
You can export spending accounts from MarketDirect StoreFront.
For more information, see Exporting.
1 Go to Administration > Spending Accounts.
The Available
Spending Accounts page is also accessible from the Manage
Department page (via
the View/Manage Spending Accounts
link) and from the Manage User
pages by clicking the spending accounts icon  .
.
2 On the Available Spending Accounts page, select either:
● Department Level (to add a department-level spending account) or
● User Level (to add a spending account for a user/buyer).
A department user can have a spending account at either the User level or the Department level (not at both levels).
3 To increase the spending limit of a spending account:
Increasing the spending limit in this way (as opposed to making a permanent change to the spending account spending limit) is intended to temporarily increase the spending limit for special uses (i.e., the need to make an exceptional purchase) that exceeds the regular spending limit.
● Select the spending account by clicking the check box to the left of it.
● Click Increase Spending Limit.
● In the Increase By: field, enter the amount by which to increase the spending limit on the account. This increase the base amount of the spending account's spending limit.

● Click OK.
4 Click Add New.
5 Set up the account using the following fields on the Spending Accounts page:
● Name: Type a name for the account.
● Select Company: From the pull-down list, select the company the department or user is associated with.
● Select Users/Select Departments: From the pull-down list, select the user/s or department/s associated with the selected company that you want to include in the spending account.
The Select Users and Select Departments field will always show the number of users/departments included in the spending account.
● (For Department-Level spending accounts only) Department Users / Spending Account Users: Select the users associated with the department to include in the spending account and click Add to add them to the Spending Account Users list. Click Add All or Remove All to add or remove all users.
A user associated with department can have a spending account at either the User level or the Department level (not at both levels). If you click Yes to allow the Department-level spending account to override the User-level spending account, the spending amount set for the user/s at the User level will be removed and the user will have to use the Department-level spending account.
Important Note on Department-Level Spending Accounts: Using department-level spending accounts does not mean that each individual user has his or her own personal allotment of money to spend. The spending account value is a global amount available at the department level. The net result is that each order placed by any of the users assigned to the spending account decrements the balance for all users. Thus, it would be possible for a single user to deplete the entire spending account amount with one order so that subsequent users would not be able to make any purchases using the spending account (and the balance shown at the top of the page would be 0 zero).
Selecting the name of the department and clicking Add will add all members of the department to the Spending Account Users list.
● Notification Email ID: Type the email address to which any notifications about spending account usage should be sent.
For example, when the price of a buyer’s order processed through an MIS system exceeds the spending account limit, an email notification is sent to this email address so that the spending account limit can be increased.
● Display Name: Type a display (screen) name by which to reference the spending account (this is the name that is displayed for the user in the banner region of the page). Example: “Department C Spending Account.”
The display name is limited to 25 characters.
● Display Spending Account Balance: Check this box to cause the running account balance to be displayed for users when they are logged in. The account balance will be displayed in the site banner.
A user can also view spending account usage history on the storefront by clicking Spending Accounts Usage on the My Account menu. The storefront Spending Accounts Usage page lists all activity on the spending account by date, order number, amount, and balance.
● Amount: Type the spending limit for the account in the standard currency for the site.
● Allow Auto Reload: Check this box to have the spending limit reload at a specified interval.

● Amount: Type the amount to reload the spending account. This is the amount that will be reloaded (i.e., added to the existing balance for the spending account) on the first day of the reload period specified in the Reload Frequency field below.
● Reload Frequency: Select the interval at which to reload the spending account: One Time, Daily, Monthly, Quarterly, Bi-Annual, Annual.
If you select Quarterly
or Bi-Annual
(i.e., semi-annual or every 6 months) you will have to set the calendar
to correspond with the end of your business quarter or half year (i.e.,
the calendar does not have built-in quarter/half yearly periods).
The daily reload frequency is available only for individual (user)
spending accounts (not for department spending accounts).
Important: The Spending accounts
in MarketDirect StoreFront
are based on calendar months/quarters. While creating a spending account,
you do not need to define any date.
For example, if auto reload is selected for Quarterly,
then the spending account will automatically reload on the first day of
quarter (i.e., January , April 1, July 1, October 1).
Similarly, if Bi-Annual is selected
then it will auto reload on January 1 and July 1.
● Carry Over: Check this box to let the previous balance on the spending account carry over into the amount reloaded.
● Reload On: If you selected the One Time reload frequency, use the calendar tool to specify the data on which to reload the spending account.
● Reload Expires On: If you selected a periodic interval reload frequency (i.e., any option other than One Time), select Never if you do not want the reload order on the spending account to expire or use the calendar tool to specify a date on which the reload order will expire.
● Active Usage Window: From...To: (Applies only if the spending account is set to reload Monthly) Specifies the days of the month during which users/buyers associated with the spending account can place orders against the spending account. For example, setting the values From 20 To 10 will define the active buying period for the spending account from the 20th day of the month through the 10th day of the following month.
6 Click Save.
For
information on running a report on your Spending Account/s and Spending
Account/s Usage, see Reports.
If a buyer associated with the spending account places an order
that exceeds the limit set for the spending account, the following alert
message will open: “You have exceeded your Spending Limit. Please adjust
the ordered items so that the Order can be checked out.”
Spending Accounts Transactions
The Spending Accounts Transactions page is a one-stop resource for Spending Account history where administrators can view important details and balance information for each of their Spending Accounts.

● To access the Spending Accounts Transactions page:
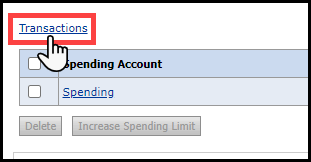
● Go to Administration > Spending Accounts and click the Transaction link.
 0
0
● Spending Accounts Transactions columns include:
● Name
● Spending Account Type:
● Add
● Delete
● Import
● Order Cancellation
● Order Placement
● Update
● Transaction Type:
● Credit
● Debit
The Name, Spending Account Type, and Transaction Type columns can be filtered by choosing the appropriate name or type from the column drop-down list.
● Amount
● Prior Balance
● Current Balance
● User Name
The User Name column can be filtered by entering the name of the user.
● Order Id
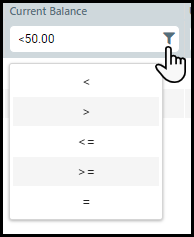
The Amount,
Prior Balance, Current Balance, and
Order Id columns
can be filtered by entering a numeric value, clicking the Filter icon,
and selecting an operation.

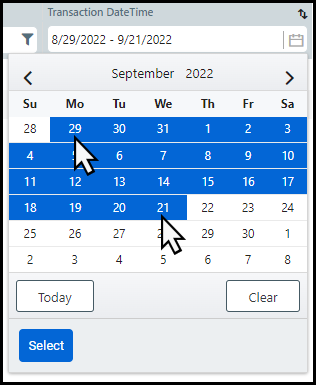
● Transaction Date
The
Transaction Date column can be filtered by clicking Select Date Range
and selecting a date range from the Calender
drop-down.

To remove the filter from a column, hover on the filter
and click ![]() .
.
Each column can be sorted in ascending (![]() ) or descending
(
) or descending
(![]() )
order by clicking the sort icon (
)
order by clicking the sort icon (![]() ) in the column header.
) in the column header.