The Cost Centers page is where you will establish cost center accounts for various entities within a company. Cost centers can represent divisions within a company, such as departments, purchasing agencies, etc., depending on your business model and company organization. Each cost center is associated with a company and company-related information and status.
For example, a company may have two different cost centers that order from your site. You can set up a separate cost center for each and link them to the same company. Once a cost center and its associated account number are created, users linked to a company can place orders on account. They will be able to enter a cost center for the company when they check out with the shopping cart.
These orders can then be tracked by account number in the system. At any time, if the account status is other than Active, users are blocked from placing any further orders on the account.
To use the Reporting tools to create and export cost center and account information for billing and invoicing, see Reports.
1 Go to Administration > Companies.
2 On the Manage Companies page, click the name of the company with the cost center you want to add (or edit) to open the Edit Company page.
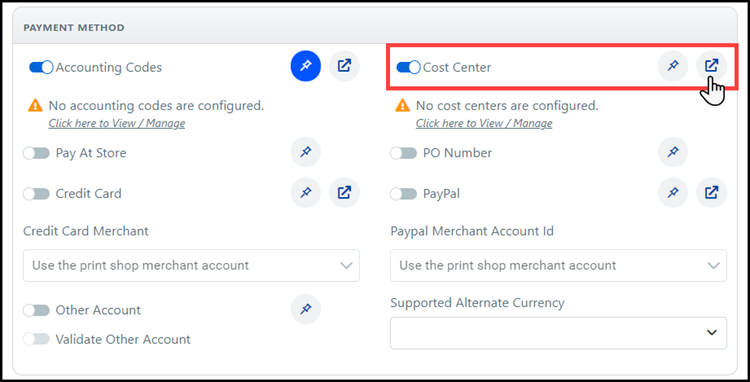
3 In the Payment Method section, click the View/Manage icon for the Cost Center toggle to open the Cost Centers page.

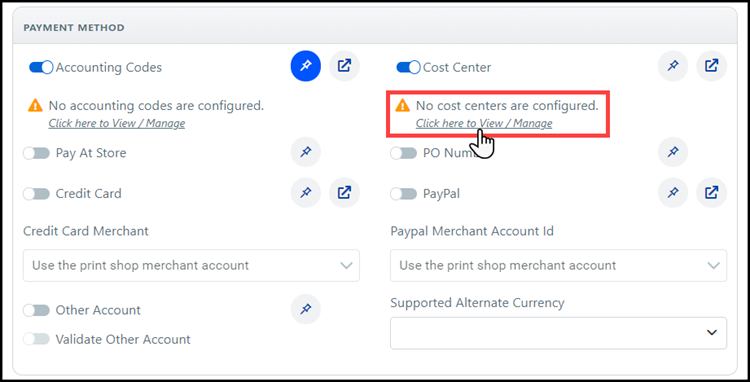
If do not have any cost centers configured, then you
can select the Click here to View / Manage
link to open the Cost Centers page.

4 Type Cost Center Display Name that specifies the new cost center. This name will display to buyers on the storefront.
5 Click Save.
6 Click Add Cost Center to create a new cost center (or click the Account Number to edit an existing cost center).

7 Add information.
● Personal Account: Check the box to indicate the account is personal, not business.
Personal Account is for informational purposes only.
● Account Number: Enter the account number.
● Account Status: Select a status: New, Active, OverDue, Frozen, Inactive. If other than Active, this account number will not be available for use when a user checks out via the shopping cart or when approving a manual quote.
● Contact Person: If not populated, after you save this page, click Contact Person at the top of the page. All required fields, indicated by an asterisk, must be completed.
● Group Invoices: Select to create invoices as a group.
● Credit Limit: Enter a credit limit value for the cost center.
● Purchase Order Required: Check to require a purchase order with each order. Enforced by the checkout. This will require a PO# if checked.
● Order Limit: Enter an order limit value for the cost center.
● Account Created: (Not editable. The system will populate this date with the current date the first time you click Save.)
● Account Expires
● Check the Account Never Expires box for a non-time-limited account.
● Uncheck the Account Never Expires box for a time-limited account. Then specify the date the account expires and is no longer valid for ordering.
Only non-expired, active accounts
can place orders or approve manual quotes. Click the calendar icon  to use the date selection tool.
8 Click Save.
9 Click Save. (It is necessary to click Save a second time to save the Account Created Date.) Or click Back to cancel your unsaved changes and reset the Cost Center information.