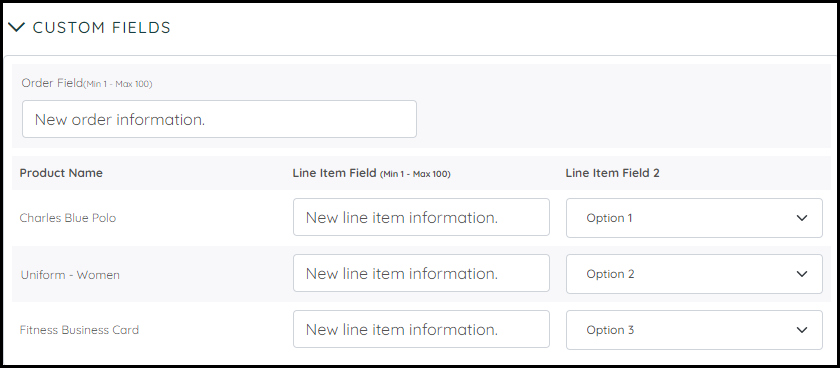
User Defined Fields allow administrators to create custom fields that will be available to buyers during checkout. These fields give buyers the opportunity to provide more detailed information about their purchase. For example, they can be used to provide additional information about an orders' billing or shipping preferences.

User Defined Fields
will only appear in SmartStore
2.0 storefronts with shopping cart 2.0 enabled.
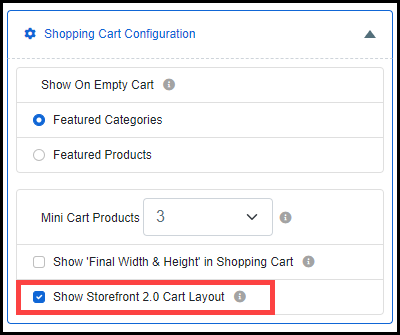
1 Go to Administration > User Defined Fields.
2 Click Add Field to open the Create User Defined Field page.
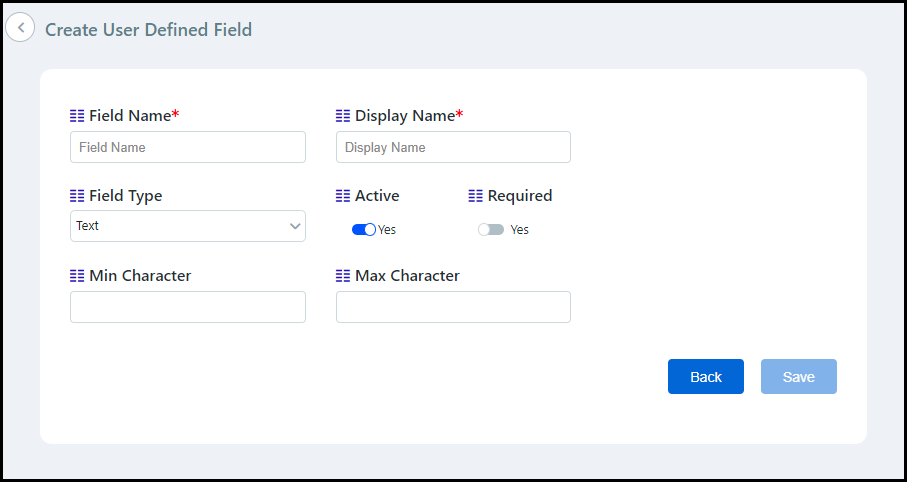
3 Complete fields:
● Field Name (required): Enter the name of the field.
● Display Name (required): Enter the name of the field that will be visible to the buyer.
● Field Type: Choose the type of field from the drop-down list.
● Text fields allow the buyer to enter text information into a field.
● Drop-down fields allow the buyer to choose an option from a drop-down list.
● Active: Enable the toggle to activate the field.
● Required: Enable the toggle to make the field required.
● Min Character: Enter the minimum amount of characters allowed in a text field.
● Max Character: Enter the maximum amount of characters allowed in a text field.
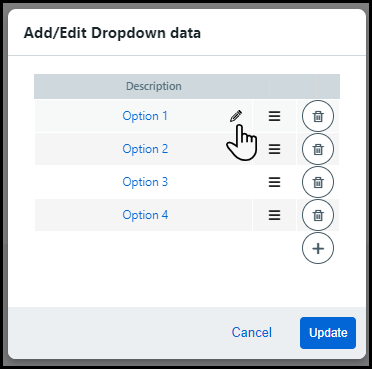
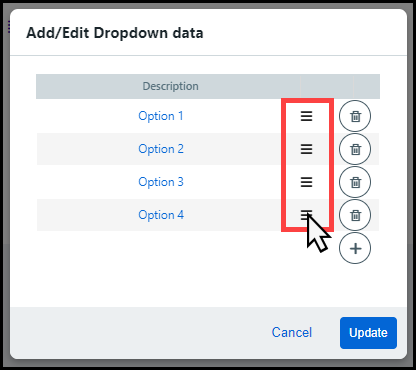
● Add/Edit Dropdown data: Add, edit, or delete options for a drop-down list.
● To add, edit, or delete drop-down options:
● Click  to open the
Add/Edit Dropdown data window.
● Click
 to add a new drop-down option.
● Enter the name of the option into the blank field.
● Hover on the option and click the Edit icon to edit the option.
● Click
 to delete the option.
The option at the top
of table will appear first in the drop-down list. Drop-down list options
can be rearranged by dragging and dropping them to a new position.
4 Click Save.
The User Defined Fields table
can be filtered using search, sort, or drop-down selections.

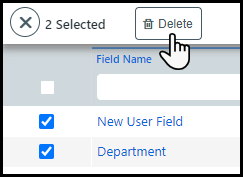
To delete a
User Defined Field, select the appropriate check-box in the
table and click Delete.
Assign a User Defined Field to a Company
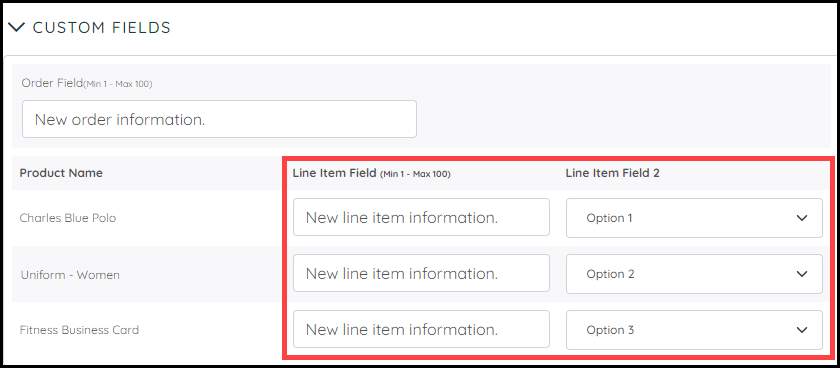
User Defined Fields must be assigned to a company before they will appear in the Custom Fields section of the Checkout page.
1 To assign User Defined Fields to multiple companies:
● Open the Companies page.
● Select the check-box next to the appropriate companies in the table.
● Choose to assign the field(s) either to the Order or Line Item from the Assign Fields drop-down list.
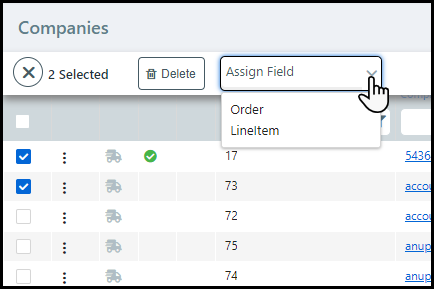
● Field(s) assigned to the Order will be applied to the entire order.
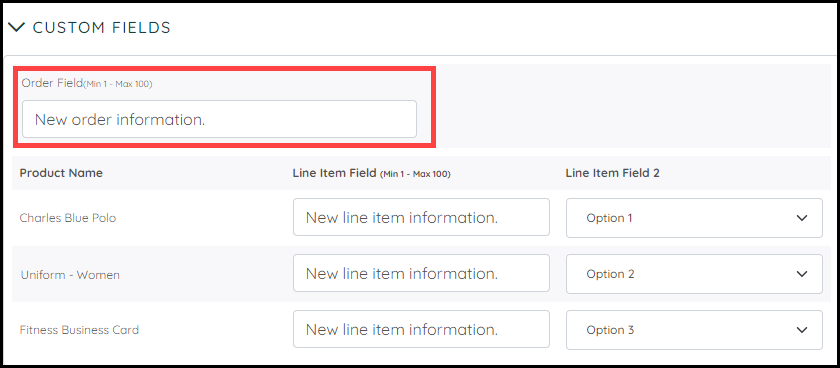
● Field(s) assigned to the Line Item will be applied to each line item in the order.
● Select the field(s) to assign to the company from the Assign User Defined Fields window.
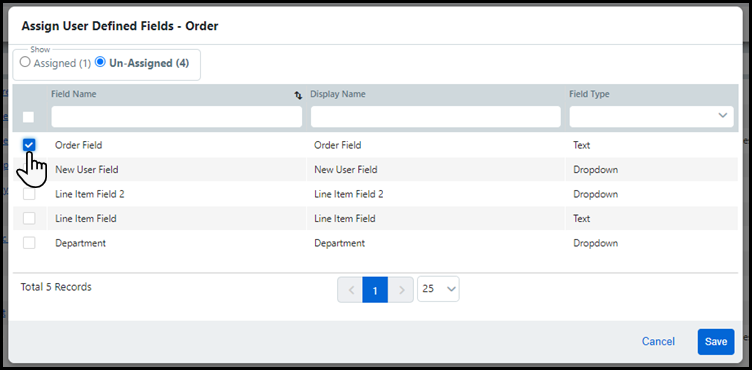
● Click Save.
To remove
a User Defined Field from a company or companies:
1. Re-open the Assign User Defined Fields window.
2. Select the Assigned radio button.
2. Uncheck the appropriate field.
5. Click Save.
2 To assign User Defined Fields to a single company:
● Open the Companies page.
● Select the appropriate company link from the Company Name column.
● Locate the Additional Settings section.
● Choose to assign the field(s) either to the Order or Line Item from the User Defined Fields drop-down list.
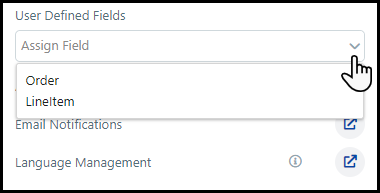
● Field(s) assigned to the Order will be applied to the entire order.
● Field(s) assigned to the Line Item will be applied to each line item in the order.
● Select the field(s) to assign to the company from the Assign User Defined Fields window.
● Click Assign.
To remove
a User Defined Field from a company or companies:
1. Re-open the Assign User Defined Fields window.
2. Select the Assigned radio button.
2. Uncheck the appropriate field.
5. Click Assign.